ST Microelectronics
B-U585I-IOT02A Discovery Board
The STM32 B-U585I-IOT02A Discovery Board is a versatile IoT development platform built around ST Micro's STM32U585AI microcontroller. This board combines ultra-low-power operation with advanced security features, making it ideal for developing IoT, wearable, and sensor applications.
Key features include:
- Ultra-low-power processing: Arm® Cortex®-M33 processor with TrustZone® security
- Memory:
- Internal: 2 MB Flash, 786 KB SRAM
- External: 512-Mbit Quad-SPI Flash, 64-Mbit Octo-SPI PSRAM, 256-Kbit I2C EEPROM
- Wireless connectivity: Wi-Fi® (802.11 b/g/n) and Bluetooth® Low Energy
- Rich sensor array:
- 3D accelerometer and gyroscope
- Temperature and humidity sensor
- Digital barometer
- Time-of-flight and gesture detection
- Multiple expansion options via ARDUINO® Uno V3, STMod+, and Pmod™ connectors
- Integrated STLINK-V3E debugger with USB connectivity
In the diagram below, you can see many of the board's physical components:

Important Links:
- Product Page: https://www.st.com/en/evaluation-tools/b-u585i-iot02a.html
- User Manual: https://www.st.com/resource/en/user_manual/um2839-discovery-kit-for-iot-node-with-stm32u5-series-stmicroelectronics.pdf
Setup Guide
This guide will walk you through setting up your B-U585I-IOT02A board with Atym, from initial hardware configuration to deploying your first container application. Follow each step sequentially to ensure a successful setup.
Prerequisites
Before setting up your B-U585I-IOT02A board with Atym, ensure you have all the necessary hardware components and software tools listed below. Having everything prepared beforehand will provide a smoother setup experience and help you avoid interruptions during the process.
Hardware
- B-U585I-IOT02A Board
- WIZnet W5500 Ethernet Shield
- Micro USB Cable
- Ethernet Cable with access to your network
Software
- STM32CubeProgrammer
- Serial Terminal application
- Atym CLI (see CLI Installation if you haven't installed it yet)
Although the B-U585I-IOT02A has built-in Wi-Fi capabilities, the on-board Wi-Fi is not currently supported as there is no Zephyr driver available. Instead, the WIZnet W5500 Ethernet Shield provides the network connectivity required for your device to communicate with the Atym Hub.
Board Setup
In this section, you'll connect the Ethernet shield to your board to enable network connectivity, which is required for communicating with the Atym Hub.
- Carefully connect the WIZnet W5500 Ethernet Shield to the Arduino headers on the underside of your B-U585I-IOT02A board.
- After that, connect the Ethernet cable to the WIZnet W5500 module.
Flashing the Atym Runtime
This section will guide you through downloading the Atym firmware and flashing it to your B-U585I-IOT02A board using STM32CubeProgrammer.
Download the Atym Firmware
Download the latest Atym firmware image specifically built for the B-U585I-IOT02A board here.
Prepare and Erase Your Device
Before flashing new firmware, it's important to properly erase the device:
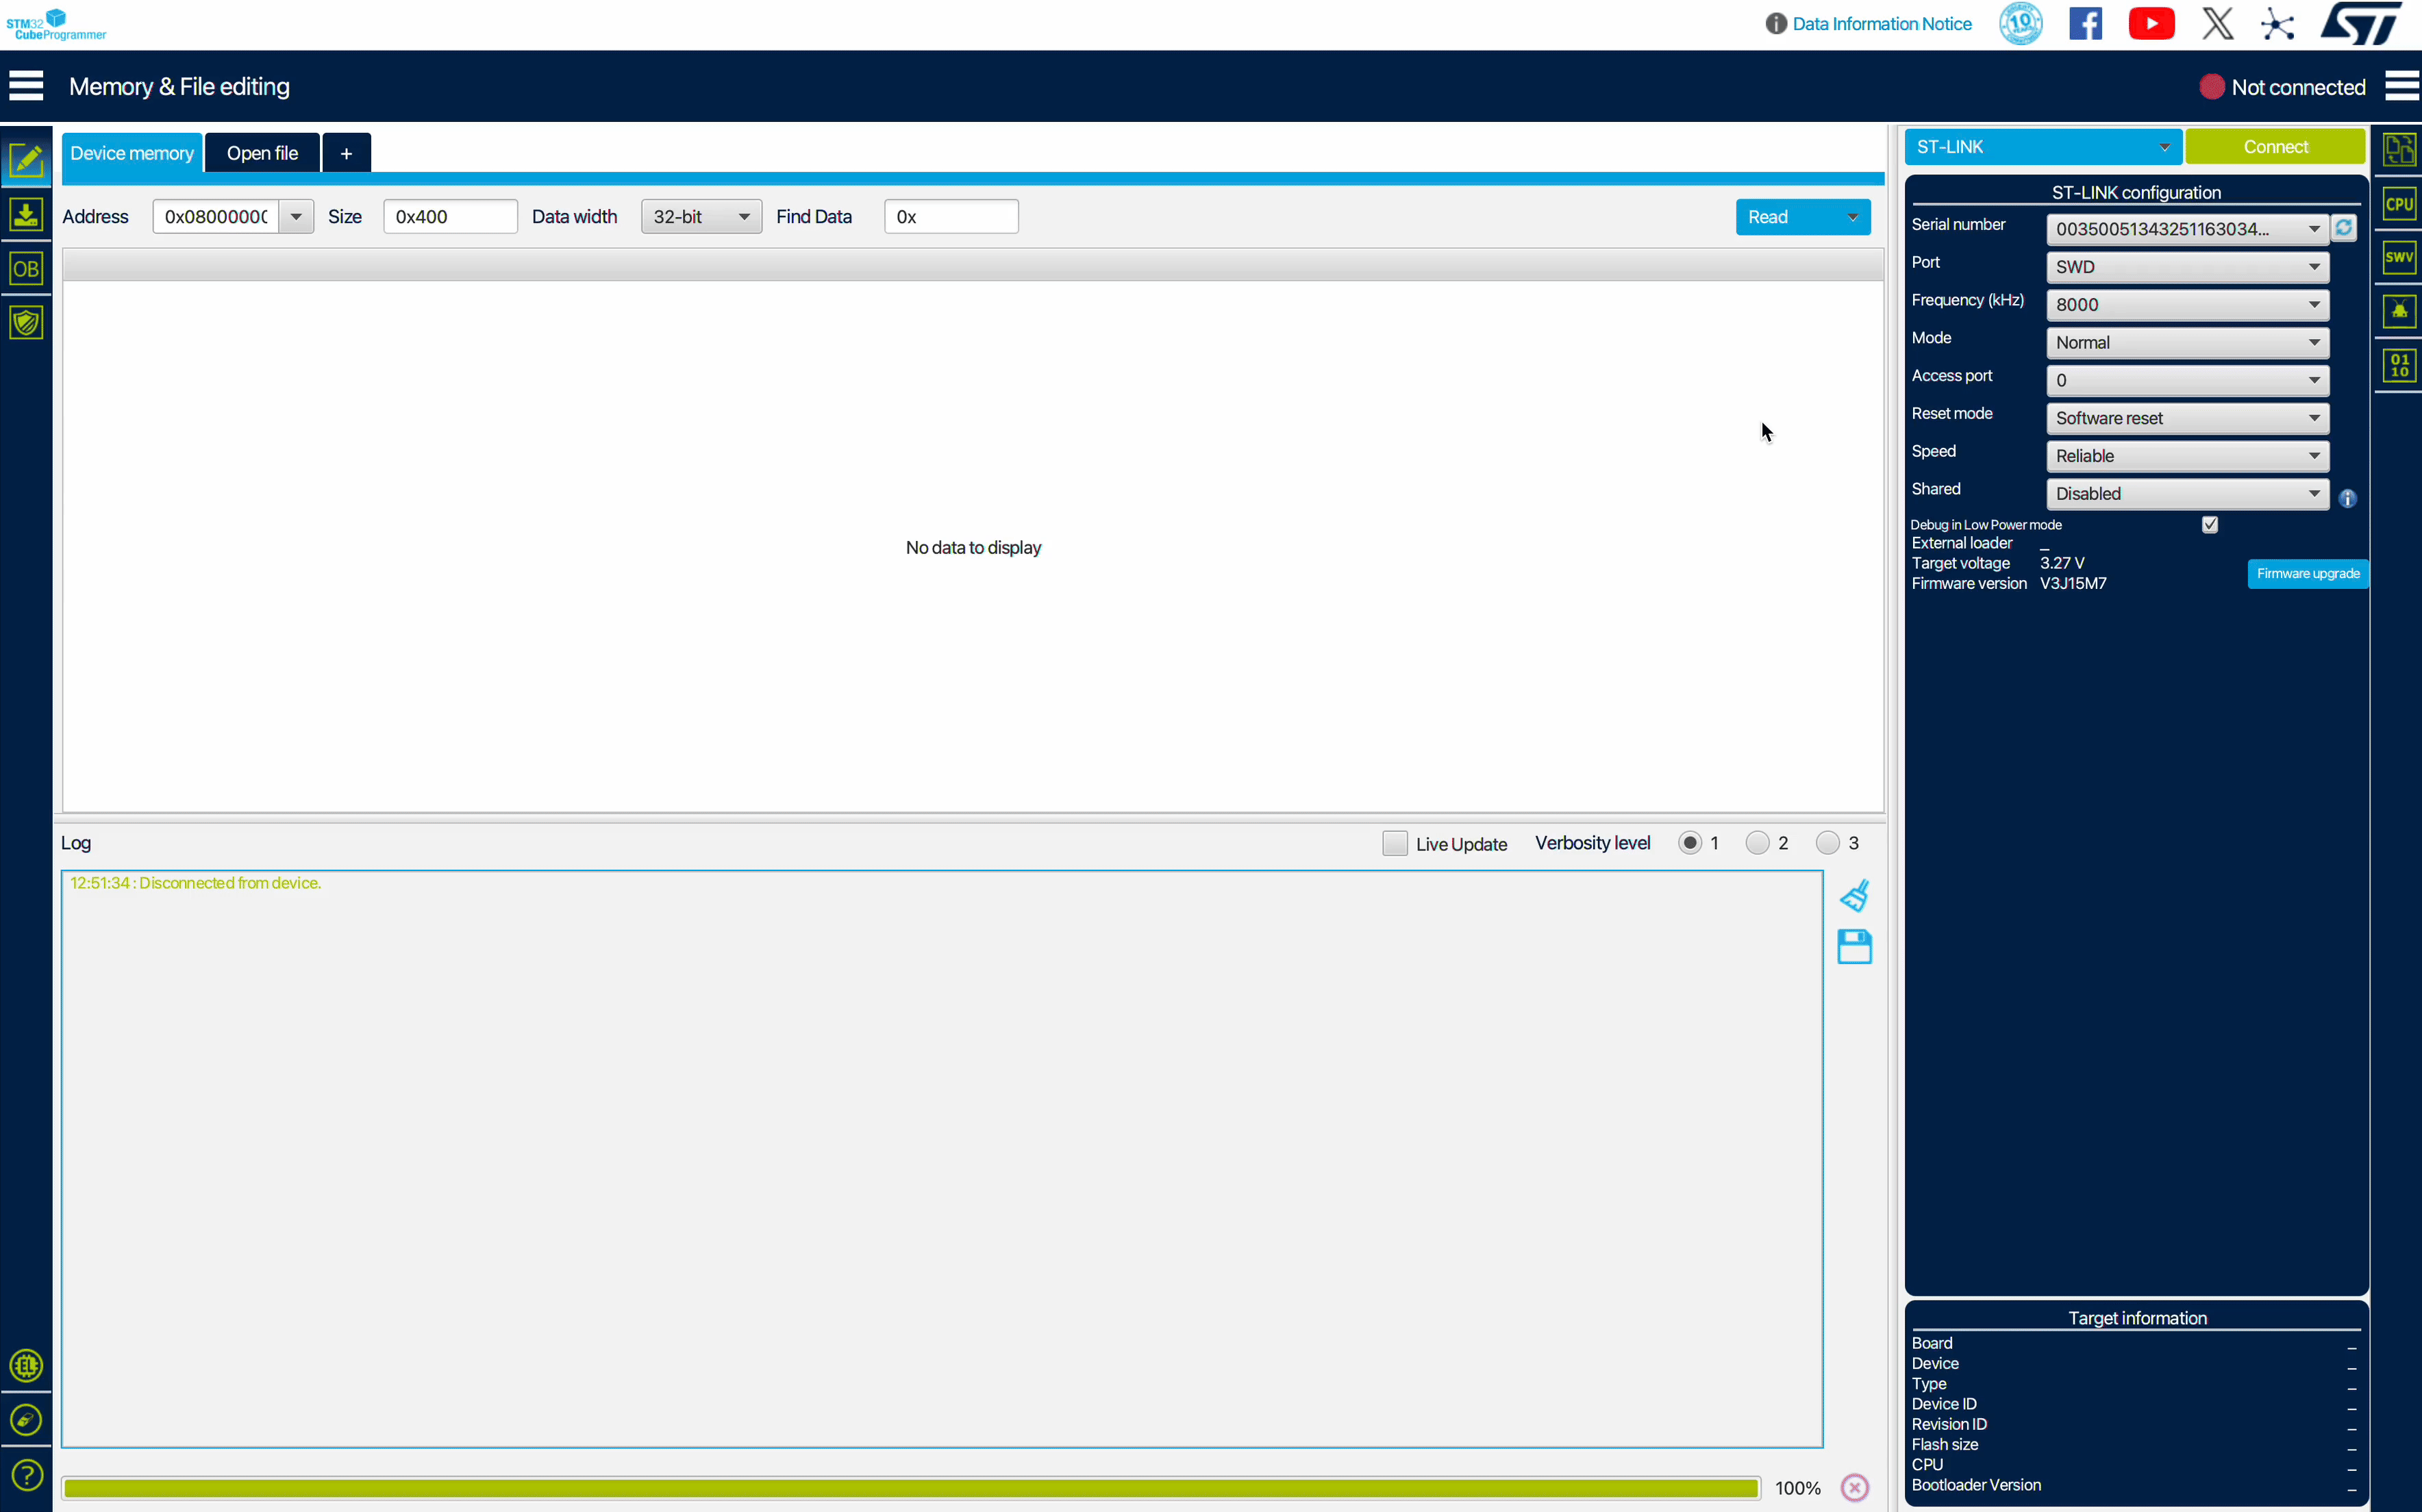
- Connect the Micro USB cable to the "ST-LINK" USB port (
CN8) on your board - Launch STM32CubeProgrammer on your computer
- In the top-right (blue) dropdown menu, select "ST-LINK"
- Click "Connect" to establish a connection with your board
- Navigate to the "Erasing & Programming" section in the left sidebar
- Click the "Full chip erase" button in the "Erase flash memory" section in the right-hand side of the application and confirm by clicking "Ok"
Flash the Atym Firmware
Now that your device is prepared, let's flash the Atym firmware:
- In the same "Erasing & Programming" section, click the blue "Browse" button, and select the Atym firmware file you downloaded earlier
- Click "Start Programming" to begin the flashing process
- Wait for the programming to complete (you'll see a success message)
- Click the green "Disconnect" button to safely release the connection

Verify Your Installation
Let's confirm that the firmware was installed correctly:
-
Open your preferred serial terminal application with these settings:
- Port: Select your device's port
- Baud Rate: 115200
- Data Bits: 8
- Parity: None
- Flow Control: None
-
Press the Reset Button on your board to restart the device
-
You should see boot messages similar to this:
*** Booting Zephyr OS build v4.4.0 ***
[00:00:02.390,000] <inf> ocre: Ocre version 0.7.0
[00:00:02.390,000] <inf> ocre: Commit ID: 8bd37cf98a90c31f31c2deddc387bea31e176098
[00:00:02.390,000] <inf> ocre: Build information:  @ Linux d0664ab537ef 6.17.0-29-generic
[00:00:02.400,000] <inf> ocre: Build date: 2026-05-25 10:18:18 UTC
[00:00:02.410,000] <inf> ocre_common: OCRE common initialized successfully
[00:00:02.420,000] <inf> ocre_common: Registered cleanup handler for type 0
[00:00:02.420,000] <inf> ocre_timer: Timer system initialized
[00:00:02.420,000] <inf> ocre: Initialized 'wamr/wasip1'
Initialized Ocre
...
These messages indicate that the Atym runtime has successfully started on your device.
Connecting to the Atym Hub
Setting up your device involves two main steps: first creating a device identity in the Hub, then configuring your physical device to connect using this identity.
Add Device to the Atym Hub
This process creates a digital identity for your device in the Atym Hub. You'll perform these steps on your development computer, not on the board itself.
Run the following command, replacing the values with your own (see the add device CLI reference for all available options):
atymctl device add --deviceName "testDevice" --description "My test device" --serialNumber "1234567890"
If successful, you’ll receive a response containing your deviceUUID, pskSecret, and tenantUUID. For example:
{
  "deviceUUID": "67c1c350-cc1c-482d-bde9-875688ff9b23",
  "pskSecret": "IEAaeWHKhYs4fAScF5ApQ0C9eGcXu123",
  "tenantUUID": "2C9D9E73-702E-49DF-8181-F7B56849B864"
}
Copy all three values to a secure location — you'll need them when configuring your device in the next steps.
Registering device with the Atym Hub
Now you'll configure your board with the credentials we copied down earlier, allowing it to securely connect to the Atym Hub.
The following steps must be performed ON YOUR DEVELOPMENT BOARD, not your host machine.
- Open a serial terminal (115200 baud, 8-N-1) connected to your device.
- Press the Reset Button to restart the device.
- You should see the command prompt
atym:~$if you're in the correct console.
- Set the device identity using your
deviceUUIDandtenantID:
atym config set device/id deviceUUID@tenantID
Replace deviceUUID and tenantID with the values you copied earlier. Make sure to include the @ symbol between them.
- Configure the device's pre-shared key using the
pskSecret:
atym config set device/psk pskSecret
- Set the Atym Hub connection details:
atym config set server/endpoint coapgw.prod.atym.io
atym config set server/port 5684
- Verify your configuration:
atym config show
The output should display all four settings with their proper values:
Current configuration:
  device/id: a612baee-dd15-42cc-a0dc-a0783c186bb5@a60dbceb-270e-4b14-a93c-60809b34c123
  device/psk: ct6P/zFOHQbvrLyRFrnh22XnXQ1H8+at
  server/endpoint: coapgw.prod.atym.io
  server/port: 5684
-
Reset your device by pressing the Reset Button to apply the configuration.
-
After rebooting, your device should connect to the Atym Hub automatically. Look for the following message in your console:
Client connected.
It may take 5-10 seconds between the time the device reboots and when it connects to the Atym Hub. If you're experiencing connection issues, check the Atym Hub Connection Issues troubleshooting guide for help resolving common connectivity problems.
Next Steps
Congratulations! You've successfully completed the setup process for your B-U585I-IOT02A Discovery Board with Atym. Your device is now properly configured and connected to the Atym Hub, ready for application deployment.
To continue your journey, check out the Build and Deploy Containers guide in the sidebar. This guide will walk you through creating, building, and deploying your first containerized application to your newly set up device.